How to plan a training session with the session planner, step by step
By Marco Baleato · · About the author
The session planner is the part of RondoMap I use most with my own team. You tell it what kind of session you need and it proposes a complete one: a warm-up, a main part and a cool-down, with tasks from the library. From there you change whatever you want and print it.
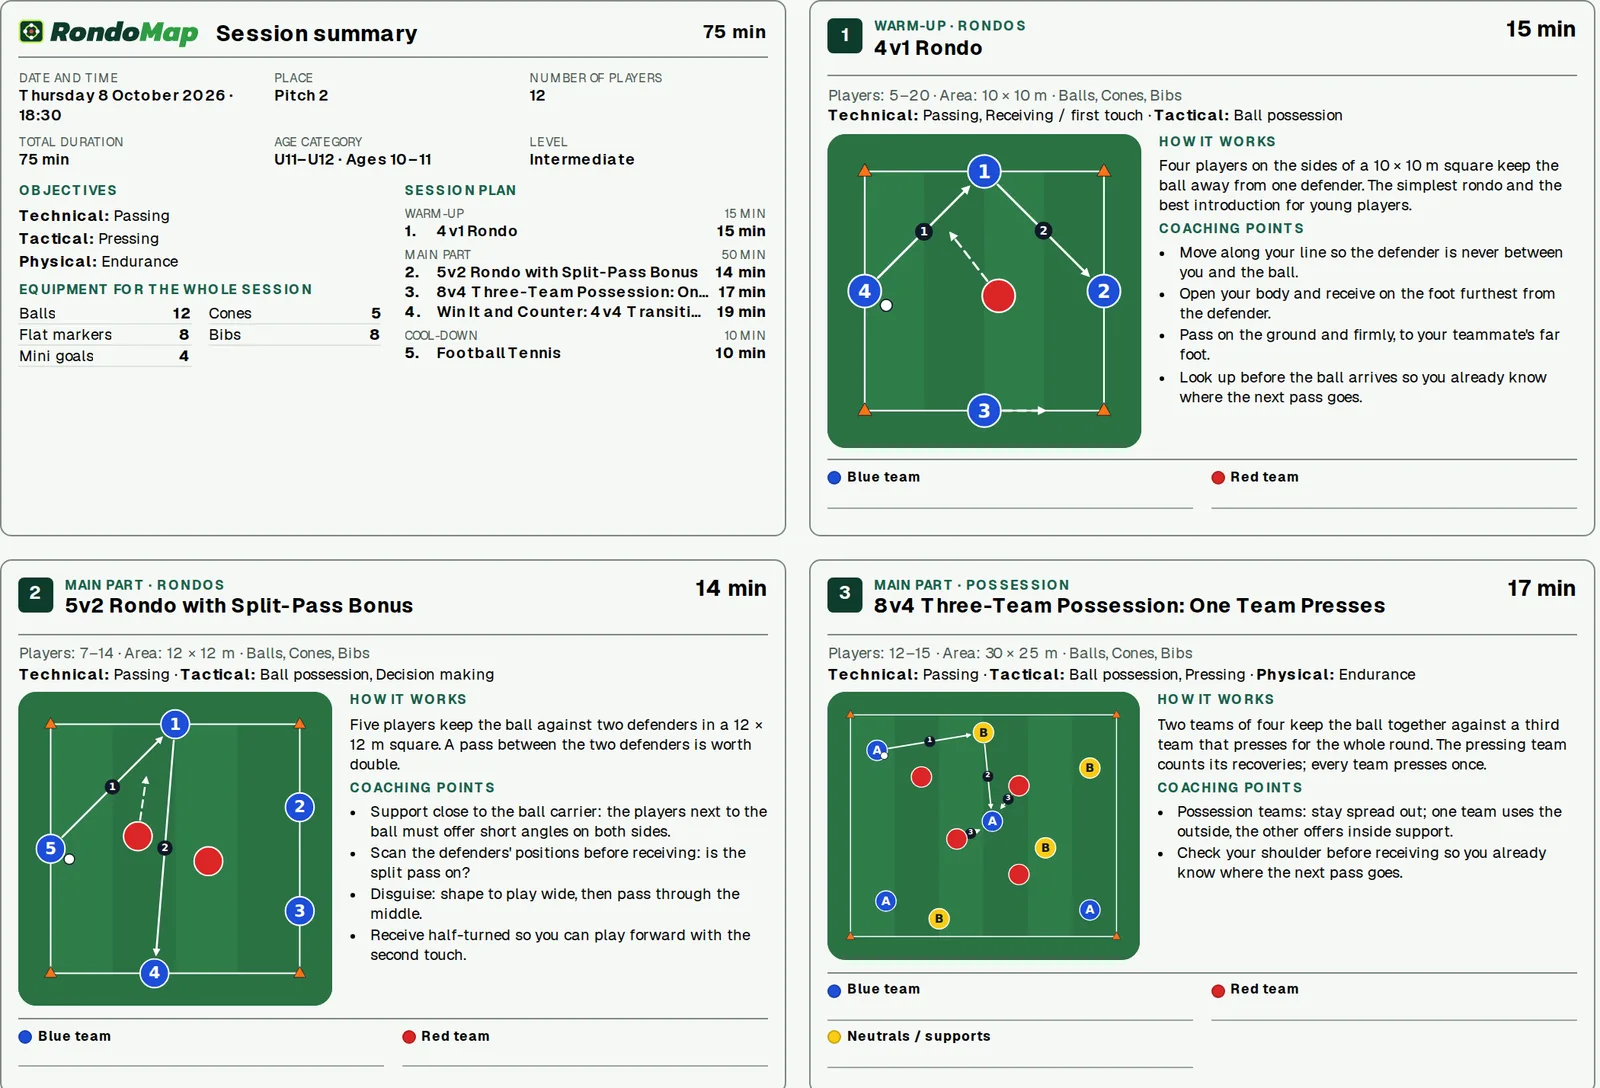
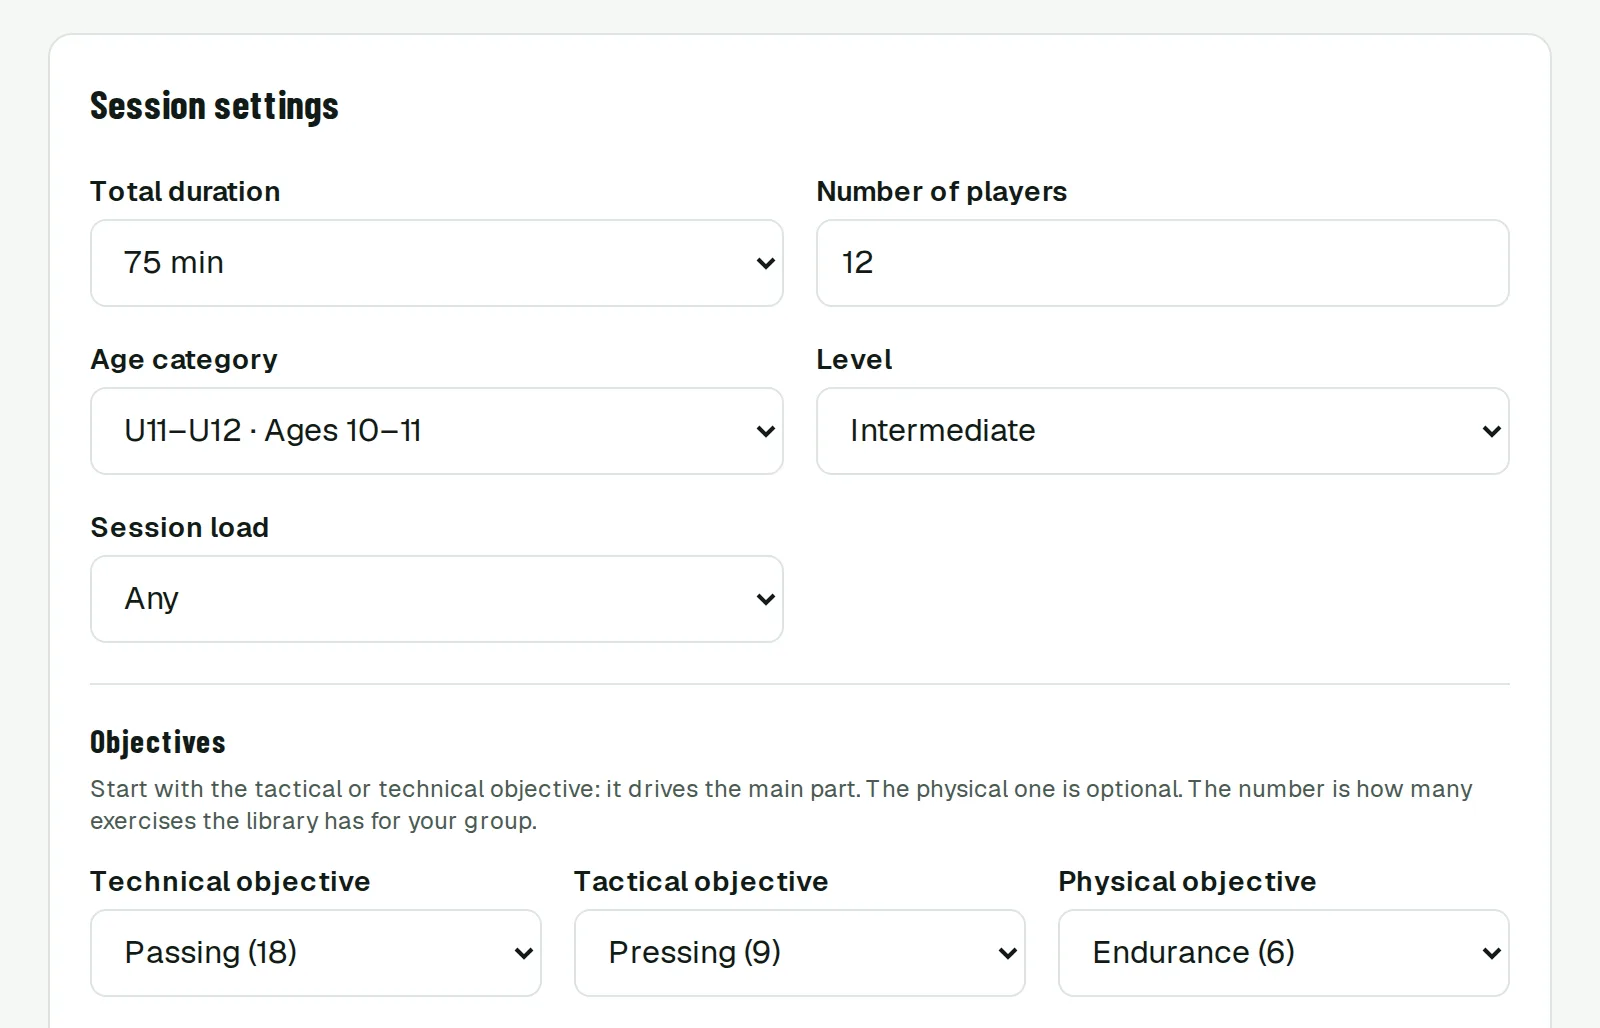
This guide follows a real example from start to finish: a 75-minute session for an U11–U12 group of 12 players, working on passing, pressing and endurance. It takes about five minutes.
1. Fill in the session settings
Start with the basics: total duration, number of players, age category and level. The session load is optional: recovery, match eve or high load, which sets the intensity of the tasks it chooses.
Then choose the objectives. Start with the tactical or technical one, because that is what guides the main part; the physical objective is optional. Next to each option, the number in brackets tells you how many tasks the library has for your group, so you can see at a glance whether there is enough choice.
Finally, tick the equipment you actually have. If you tick nothing, any equipment is allowed; balls are always assumed. If you are short of time, the example sessions next to the form fill everything in with one click.
2. Review the proposed session
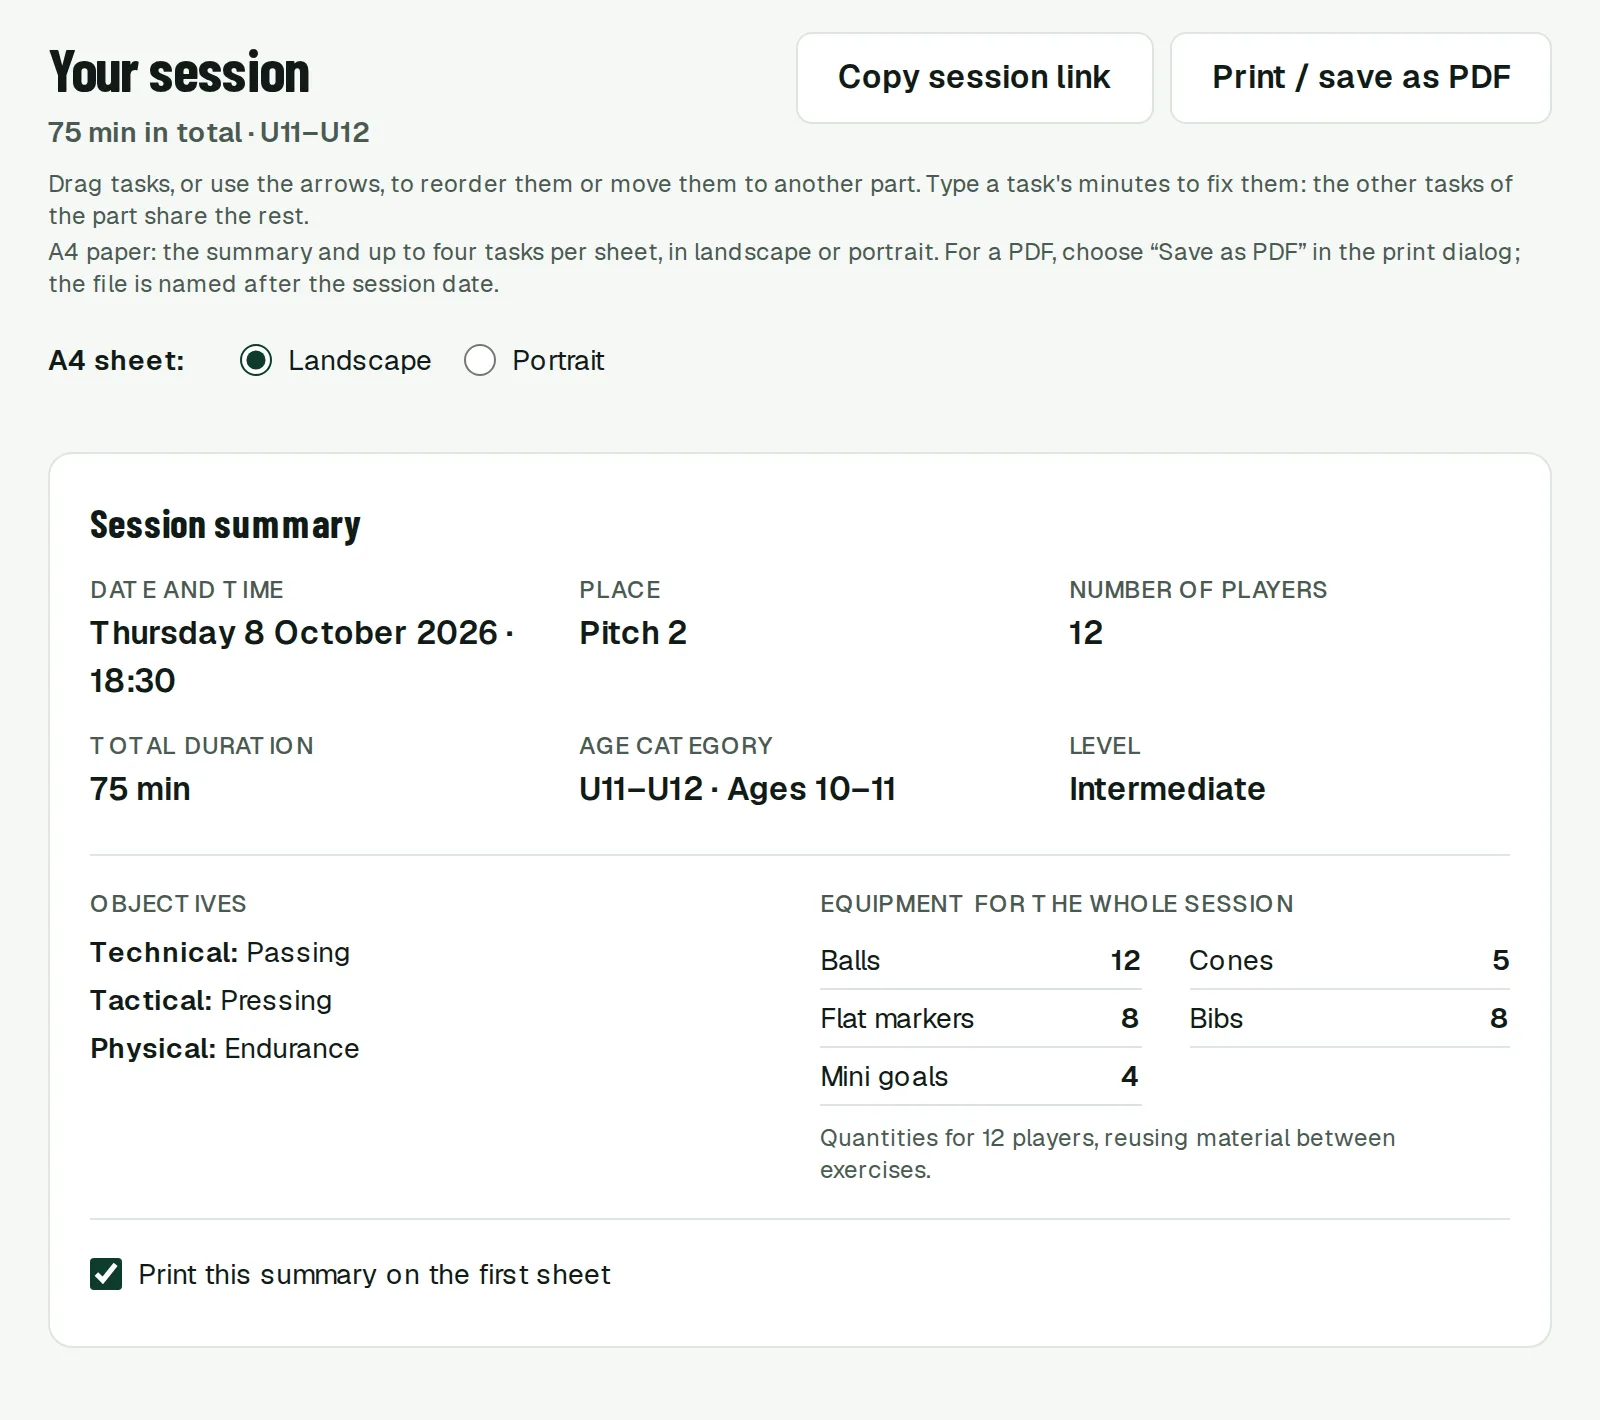
As soon as you fill in the settings, the session appears below: the tasks for each part, the minutes for each one and a summary with the date, place, objectives and the equipment for the whole session. The equipment quantities are calculated for your number of players, reusing material between tasks.
Add the date, time and place, and up to three measurable goals if you want to check something specific (for example, keeping 8 out of 10 throw-ins). Everything is saved in the page address: the Copy session link button gives you a link that opens the same session on any device.
3. Adapt every task
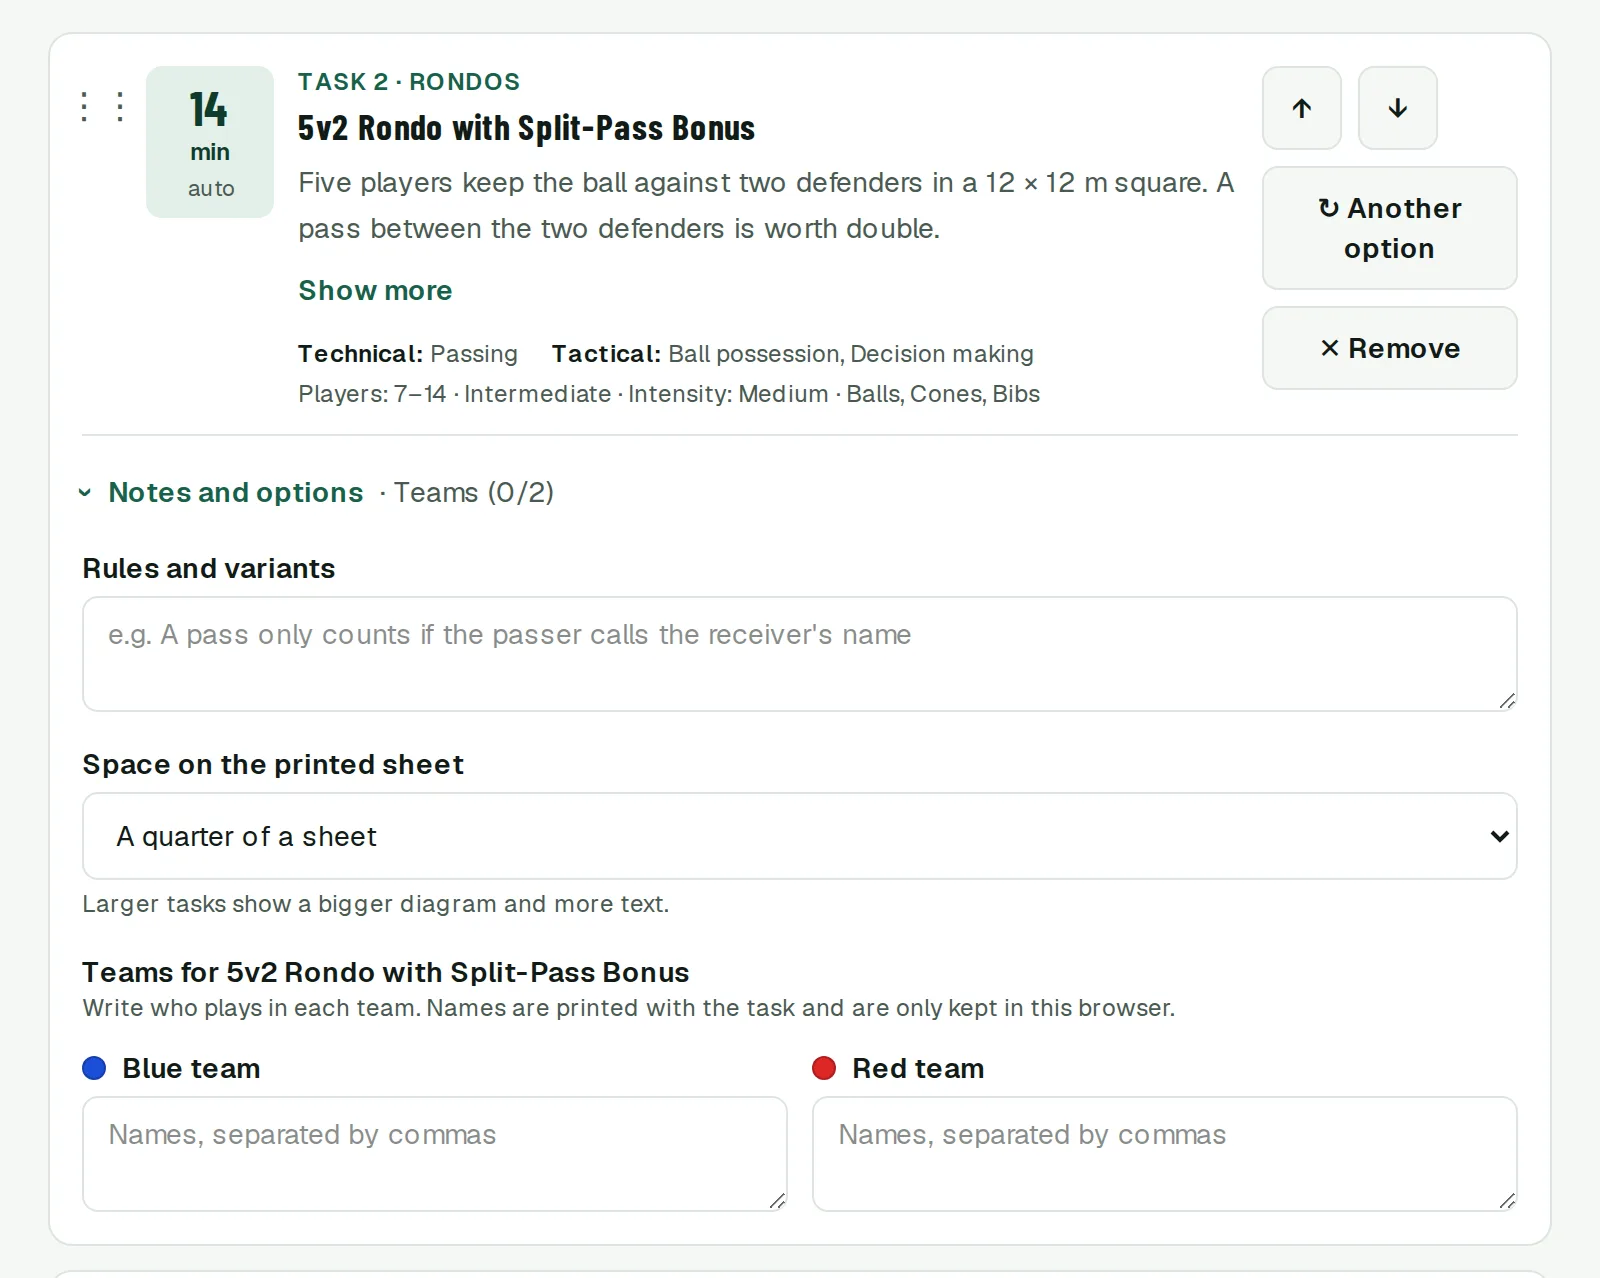
The proposal is a starting point. Each task has buttons to change it for another option or remove it, and arrows (or drag and drop) to reorder it or move it to another part of the session.
The minutes are shared out automatically. If you type a task's minutes, they stay fixed and the other tasks in that part share the remaining time; the Auto button undoes it.
When a task does not quite fit your settings, it tells you. If you have more players than the task allows, for example, it suggests how to organise them: split into groups playing at the same time, rotate players every few minutes or use the extra players as wildcards. It does the same when a task needs equipment you have not ticked or is designed for another age group.
Under Notes and options you can write your own rules and variants, choose how much space the task takes on the printed sheet, write the players of each team and mark that a task runs at the same time as the previous one, for example a goalkeeper task alongside a rondo.
4. Add tasks from the library or your own
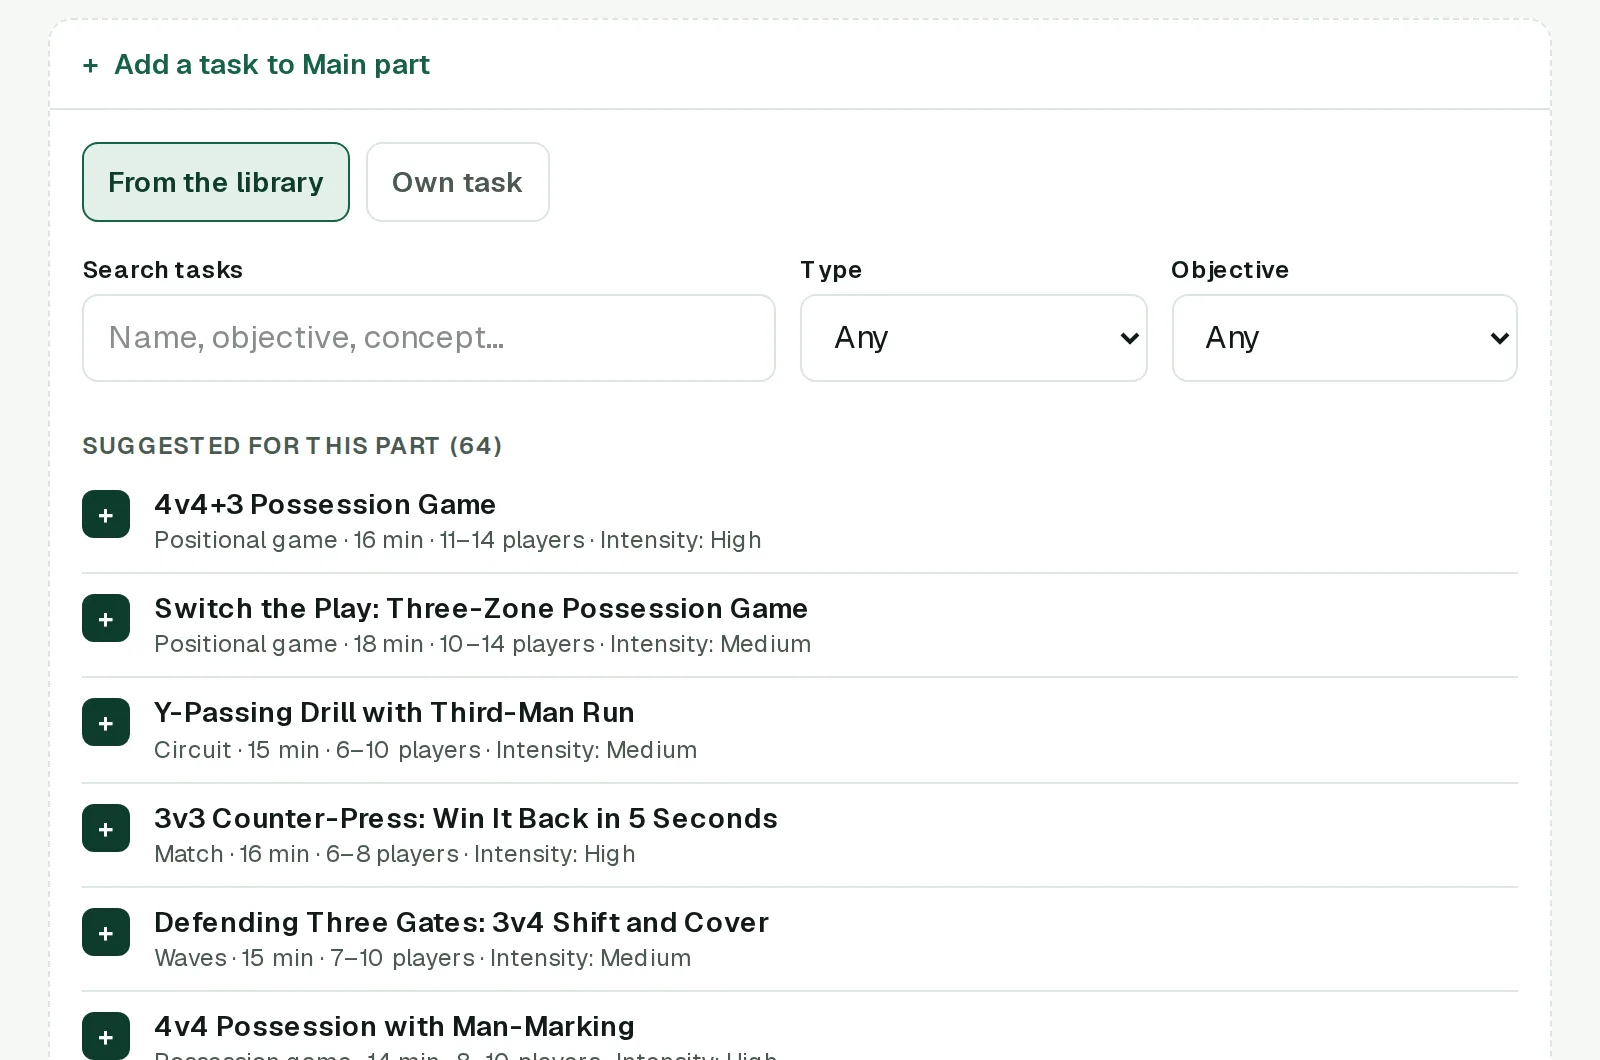
Each part has a button to add a task. The library tab first shows the tasks recommended for that part, and you can search by name, objective or content, or filter by type and objective.
If you want to use an exercise that is not on the website, the Own task tab lets you write a title, minutes, equipment and organisation. When printed, it can leave a blank box to draw the diagram by hand. You can also add a short talk at the start of the warm-up and a final talk to close the session.
5. Your squad and teams
In the Squad section you add your players once and, before each session, tick who is coming. With one click, the number of players present becomes the number of players for the session, and the planner recalculates everything.
Fill from the squad shares the players present among the teams of each task, placing the goalkeepers where the task needs them. Players' names are saved only in your browser: they are never stored in the link or sent anywhere.
6. Print it and take it to the pitch
Print / save as PDF prepares A4 sheets, in landscape or portrait: the summary on the first sheet and up to four tasks per sheet, each with its diagram, how it works, coaching points and the teams. To keep it on your phone, choose Save as PDF in the print dialog; the file is named after the session date.
That is all it takes. If you miss something in the planner, or a type of task you cannot find, the suggestion box is the best place to tell me.